2nd Brigade now crossing the ford to back up the dismounted troopers.

The die rolling was not kind to the Union and they are still unaware that the Rebs have crossed the creek and are now massing on their right flank.

The Confederate troopers advance to the wall of the farmstead as the infantry move up in support.

One unit of troopers now relieved by the infantry move even further forward. It is at this point that the die rolling meant the Union now knew enemy troops were across the creek.

The Confederate Brigadier surveys the field, hardly believing his luck.

The remainder of 2nd Brigade are now all across the ford and deploying.

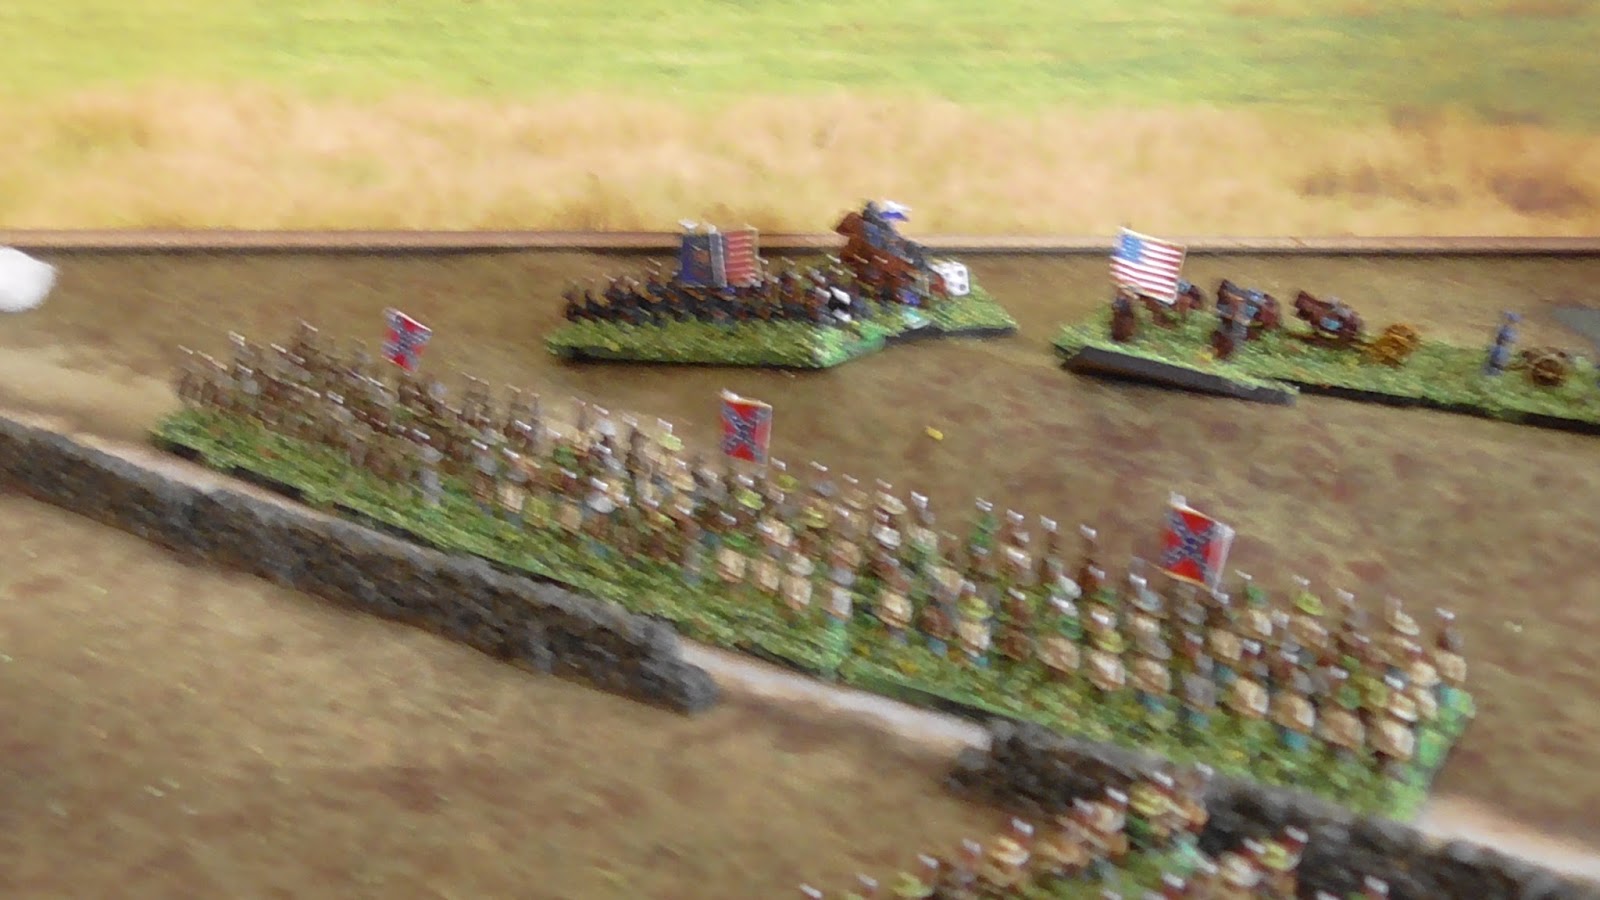
In front of the bridge the Confederate 1st Brigade begin to advance slowly, forcing the Union commander to keep most of his troops in place.

The Union troops now aware that the enemy is also on their flank and across the ford, watch grimly as the Rebs advance.

The Union commander orders his reserve brigade, the 2nd, to advance up the ridge and engage the advancing rebels at the farmstead.

They crest the ridge and a regiment guarding the right flank near the bridge are about faced to counter the rebel threat from the farmstead.

His infantry moving into position, the Union commander sends a regiment of cavalry back along the road in an attempt to slow down the advancing rebels who are threatening his line of retreat.

The cavalry gallop off as ordered.

The Union 2nd Brigade reach the perimeter wall of the homestead and try to reform lines after the hasty advance over the ridge.

The single infantry regiment by the creek, wheel into line to face the dismounted rebel troopers.

The Confederate artillery batteries arrive as the 2nd Brigade are already across the wall and in the grounds of the farmstead.

The Union cavalry sent to the flank are horrified at the sight of hundreds of enemy troops surging across the farmstead.

The rebel troops, seeing the dis organised Union infantry, form up for an assault. Even the cameraman is feeling the gravity of the moment with a hurried and blurred shot.

The Union cavalry come face to face with dismounted rebel troopers.

The Confederate batteries, having crossed the ford, hurry forward to deploy.

The two brigades face each other over a stone wall.

A terrifying sight for friend and foe!

The rebels let loose a volley that roars down the line.

It is too much for one Union regiment which breaks and flees, a second is forced back and is shaken, a third, though not shaken, is also pushed back.

A gap in the centre of the Union line, the Union brigadier orders his one and only uncommitted regiment to plug the gap.

The Union troops now advance and unleash a volley into the rebs.

Pushing back, but not shaking, two of the three regiments.

Both sides furiously re-load their muskets as the order from the Confederate brigadier is 'Fix bayonets lads, let these damn Yankees feel cold steel!'

The Union commander now orders two of the artillery batteries covering the bridge to limber up and support the cavalry at his rear.

At the rear, a battery of rebel cannon are ready to go into action, supported by dismounted troopers.

With the Rebel Yell filling the air, the confederate regiments surge forward into the Union troops.

The Confederate general now deploys two regiments of the 1st Brigade to advance and cross the ford. He still maintains a battery of guns and two regiments in front of the bridge.

The bayonet charge has the desired result, another Union regiment is broken and the two remaining fall back shaken up the ridge. The rebels now over the wall pursue them.

Once again the attached news correspondent and his photographer are caught up in the heat of the moment and manage only a blurred shot of the corner of the farmstead, where a fourth rebel regiment advance to the wall to face the now confused Union infantry regiment.

The Union troops advance.

To be met with a withering volley that pushes them back shaken.

Back at the road the Union cavalry are engaged by the deployed rebel battery.

The cavalry are shaken and sensibly pull back.

The Union Commander fully aware of how badly things are going, strips more units away from the bridge in a vain attempt to hold the flood of rebels.

Artillery and infantry desperately attempt to get into position.

At the South end of farmstead, the dismounted rebel trooper move up to support their infantry brothers.

Meanwhile the two regiments, dispatched from 1st Brigade are nearing the ford.

The rebels once again fill the air with their terrifying yell and surge up the ridge to hit the outnumbered and shaken Union regiments. The Union battery commander doesn't now know which way to face?

The result was inevitable, another Union regiment breaks whilst the second is pushed back.
At the South wall, the already shaken Union regiment is now faced by dismounted troopers and a fully functioning rebel infantry regiment.

With musket balls cutting down the boys in blue like a scythe through wheat, the regiment becomes the fourth to break and run.

The Union general, with enemy troops ahead, on his flank and cutting off his line of retreat and now outnumbered virtually two to one, surrenders.

The four destroyed Union regiments, the rebels didn't lose a single unit.

So the Battle of Blackwater Creek ended in a convincing and total Confederate victory, they also of course collected some valuable ordnance which would in due course be used against its former owners. But that of course is a battle for the future.
I hope you enjoyed the battle, I certainly enjoyed fighting it out on the table, the Union really did suffer from some terrible die rolls and not detecting the enemy crossing the ford for so long into the game really hit them hard and made it almost impossible to respond. The game should have ended after one side or the other had lost six units, but the Union position had become impossible and sensibly the game was ended to prevent what would have become a pointless bloodbath.


