Model Soldiers, Table Top Battles, Campaigns and N Gauge Model Railways.
Showing posts with label Baccus 6mm miniatures. Show all posts
Showing posts with label Baccus 6mm miniatures. Show all posts
Saturday, 6 April 2019
More for the summer painting table.
I am preparing the items that I hope to get painted over the summer. I do have the pieces for the board game War of the Rings to paint, almost 300 of them as well as the fighters from Star Wars Armada.
I also want to finish my 6mm ACW armies too. So some partially painted generals, flag bearers with Corps Flags will be worked on.
I am also a bit light on cavalry, so a few horse holders.
Dismounted cavalry and casualties.
A whole box full of primed casualty figures.
On to 28mm, with enough troops hopefully, to create a Crusader army of the Second Crusade. These boxes have sat on my shelf for nearly two years.
I do already have an army of Saracens led by Saladin, so they will finally get someone to fight.
I shall base them in the same fashion, in fours, twos and singles. It will allow me to use many rule sets.
Not a huge army, but big enough for my needs, I only need to add a metal miniature of Richard the Lionheart.
Sunday, 10 March 2019
A small American Civil War Battle
Setting up for a small fictitious battle. A sleepy town somewhere along the Pennsylvania and Maryland Railway (P&M).
The town of Barnett's Meadow
Deep in the Union heartland.
The railway line carries vital supplies to the Union Army of the Potomac, currently far to the south.
After a long, sweeping ride, a Confederate cavalry brigade with attached horse artillery arrives in the town. Its mission to close the line and prevent further supplies reaching the Union troops.
A Division of Longstreet's Corps has been diverted from Lee's Army to take over the defence of the area and it is hoped to draw in Union troops currently attempting to track Bobby Lee's main force.
Monday, 2 April 2018
Battle Cry with 6mm on table.
Scenario is Gettysburg, second day. Devil's Den, Wheat Field, Peach Orchard and Little Round Top.
Board laid out and units in place.
Anderson's Division nearest the camera will have to pass through the woods to attack Humphrey's Division.
20th Maine sit atop Little Round Top.
Hood's Division, lower left, prepare to assault the Union left flank, with just the small problem of Devil's Den and Little Round Top ahead of them.
I will make a record of the battle which I intended to start today, but the weather has been dark clouds and heavy rain all day, not ideal for video or photography. However, tomorrow is forecast to be much better, so I will start then.
I will use dice to record casualties to each unit, and I am also adopting the C&C Napoleonic system in as much as a unit will only throw the number of dice equal to the strength it has remaining, not four dice (for infantry) even when reduced to strength one.
Thursday, 21 December 2017
Work has begun on the ACW reinforcements.
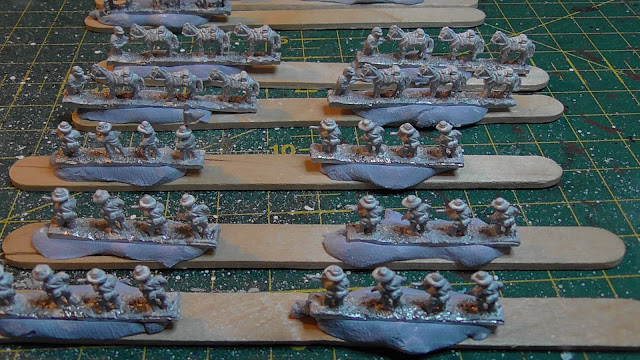
As promised, I am showing all the reinforcements I ordered out of the bags. In fact, flash has been removed, there was very little of it, the bases filed flat, all washed and scrubbed in soapy water and finally stuck onto lolly (Popsicle) sticks. Last night I hand primed them, it has been to wet and damp outside to use a rattle can.
All the guys laid out ready for painting.
Dismounted Union troopers and horse holders.
Mounted Confederate troopers, enough for five regiments of nine figures, to be split in a 4 and 5 on 30 x 30 mm bases,
Dismounted Confederate troopers and horse holders.
Mounted Union troopers, exact same numbers as the Confederates.
Finally, the generals for both sides. I miscalculated here, I could have done with more flag holders, I only have a total of six. Baccus are fine if you contact them, which is what I will do in the new year and request a pack of 15 standard bearers. They will supply any pose you wish, to the same amount of figures and price of a standard pack.
They will do the job for now, as I really need a Union VI Corps commanders base for my ongoing campaign. I shall probably use all of them for the Union, as I do have enough Confederates for now.
Tuesday, 19 December 2017
ACW reinforcements arrive.
Probably my final update on this blog before Christmas, so season's greeting to all who read this, and even to those who don't.
My small Baccus order arrived this morning. It will allow me now to create some cavalry regiments for both sides on 30 x 30 mm bases, something I don't currently have. I was also a bit light in cavalry anyway, so these new boys will solve that problem.
I took the opportunity to order a command pack for both sides too, I needed some more divisional and corps commander stands.
The Corps flags will be placed with the Corps Commander, rather than the Stars and Stripes for late war era battles.
Sorry for poor photo quality, I will show them when cleaned up and ready for painting. The two command packs.
Dismounted cavalry and horse holders.
Mounted cavalry, enough for five regiments of nine minis each side.
As I am currently fighting a mini-campaign, the reports are over on the TtC Blog page. These guys will get bumped up the painting queue as I need the smaller sized bases for showing column.
Tuesday, 12 July 2016
Have a break, have a battle!
Well I have now finished the Montrose Irish and their carronade and crew (photos on a later blog post). So today I set up a battlefield for a solo American Civil War battle in 6mm. I shall be using the modified Blucher rules for this fictitious battle of 1863.
It is April 1863, Hooker's Army of the Potomac has advanced deep into Confederate territory. Both the Union and Confederate armies are very close and a battle is in the offing. The battle displayed on my table is just one part of a much larger action.
So the scene is set, the forces are gathered. I shall play this game solo and it will be fought over the next day or two. I am also making a video of each turn which will be on my You Tube channel.
It is April 1863, Hooker's Army of the Potomac has advanced deep into Confederate territory. Both the Union and Confederate armies are very close and a battle is in the offing. The battle displayed on my table is just one part of a much larger action.
Looking down the length of the table, it contains three objectives, each marked with a red disc. A farm at the far end on a road is one objective, a second farm, also on a road, is the second objective and finally the hill nearest the camera is the third and final objective.
The hill with its tumbled down rocks is the highest point on the table, it has a red objective marker on its summit as does the farm down in the valley to the left.
In the centre of the table is the farm pictured above, this shows the long ridge on the left of the photograph.

The final objective is another farm, again on a road.
The hill with its ancient rock falls is going to be a tough nut to crack for any attackers.
The ridge that runs from front to rear of the table divides the two farms, and obstructs sight.
The troops needed for the battle. The Union VI Corps of the Army of the Potomac numbers two divisions with 29 infantry regiments, five artillery batteries and two regiments of cavalry. The Confederate forces also consist of two divisions with 24 infantry regiments, four artillery batteries and a brigade of cavalry.
Close up of the infantry that will be involved, with brigade, division and corps commanders.
Union cavalry with mounted at rear, dismounted centre and horse holders in front.
Confederate Cavalry brigade and four batteries of artillery.
So the scene is set, the forces are gathered. I shall play this game solo and it will be fought over the next day or two. I am also making a video of each turn which will be on my You Tube channel.
Friday, 1 April 2016
To the strongest.
Hi all, and welcome to the final post on the First Battle of Bull Run/Manassas.
I should point out at this point that according to the rules in Blucher, I have worked out the breaking point for each army, each brigade of infantry and cavalry count. The Union break point is four units and the Confederates five. However, when one of the forces does reach that break point, it will not come into effect until the end of the turn, so giving the loser a chance to draw.
Extract from a letter.
We watched those artillerymen and horses struggle up the slope towards us, they had no idea we were waiting to greet them. Finally, someone must have got wise and all panic ensued. They tried desperately to turn around on the slope, but it was no use. We hollered and whooped as we surged forward, I had my two pistols fully loaded. The boys opened up at close range, them Yankees fell like jack rabbits in a hunt, the rest on 'em running and sliding down that hill as fast as they could. They had left all their artillery pieces behind, but we were in no position to take charge of them. The commotion hadn't gone unnoticed and a brigade of infantry peeled off the main force and headed in our direction. Things could get hot around here...
Captain Moulden, Stuart's Cavalry, Johnston's Division, Confederate Army of the Shenandoah.
Shots taken at the end of Turn Eleven.
Turn Twelve
Turn 13
Balloon shots at the end of Turn thirteen.
Turn 14
Extract of a letter.
We moved up to the ford when a unit holding it was forced back, I ain't never seen such a sight in my life, thousands of blue coats in front of us and all coming straight for us. We fired our muskets as fast as we could load 'em and the enemy did the same thing. All of a sudden the damn Yankees charged right at us, we wasn't expecting that. Most of us hadn't even fixed our bayonets in the rush to get forward. It was a massacre, the boys were cut down and we were pushed back from the ford. I took a bayonet to my left thigh, but don't you worry, it was more a flesh wound and didn't hit anything vital...
Private Booth, Smith's Brigade, Johnston's Division, Confederate Army of the Shenandoah.
Extract from a letter.
We had faced and stopped two Yankee brigades, we never let one of them pass us, or take the ford from us. A lot of the boys are gone, others will heal, many will not. I have nothing more than cuts and bruises, though I do have a hole in my hat, where a musket ball must have passed an inch above my head. I am glad my 90 days is almost up, I sure have had a belly full of this war...
Private Clay, Jones's Brigade, Beauregard's Division, Confederate Army of the Potomac.
Rosser's Battery seizes the moment to fire on Griffin's Battery.
Turn 15
McDowell now realises his army is in danger of being cut off from Washington, they may well be able to clear the way to Manassas but a Rebel army will have nothing between here and the capital to stop them'
Extract from a letter.
Tidball's Battery pour a devastating canister fire on Evan's Brigade, making it now ineffective with only 1 elan left.
Final shots of the battlefield at the end of the battle.
Thank you all for taking the time to read, comment and like the previous posts. I think this shows that Blucher can work in a larger ACW battle. It was a close run thing, if the Union main attack had got onto the battlefield a little earlier, or the feint had been delayed, then things may well have been different.
I should point out at this point that according to the rules in Blucher, I have worked out the breaking point for each army, each brigade of infantry and cavalry count. The Union break point is four units and the Confederates five. However, when one of the forces does reach that break point, it will not come into effect until the end of the turn, so giving the loser a chance to draw.
Extract from a letter.
We watched those artillerymen and horses struggle up the slope towards us, they had no idea we were waiting to greet them. Finally, someone must have got wise and all panic ensued. They tried desperately to turn around on the slope, but it was no use. We hollered and whooped as we surged forward, I had my two pistols fully loaded. The boys opened up at close range, them Yankees fell like jack rabbits in a hunt, the rest on 'em running and sliding down that hill as fast as they could. They had left all their artillery pieces behind, but we were in no position to take charge of them. The commotion hadn't gone unnoticed and a brigade of infantry peeled off the main force and headed in our direction. Things could get hot around here...
Captain Moulden, Stuart's Cavalry, Johnston's Division, Confederate Army of the Shenandoah.
Stuart's Cavalry let loose a volley at point blank range, three hits destroy the battery.
Rickett's Battery is no more.
Though for some odd reason I have put it back on the table, please ignore it in the following couple of photos. Sherman's Brigade, witnessing the incident, peel off from the attack force and approach the hill occupied by Stuart's Cavalry.
Sherman's Brigade commence the climb up the hill.
Jones's Brigade fire on Porter's Brigade and cause another hit.
Bartow's Brigade fire an ineffective volley at Franklin's Brigade, at Blackburn's Ford.
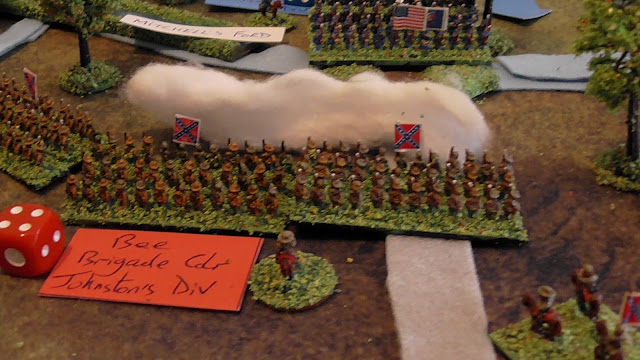
Bee's Brigade hammer at Howard's Brigade, two hits.
Evan's Brigade cross the now uncontested Ball's Ford.
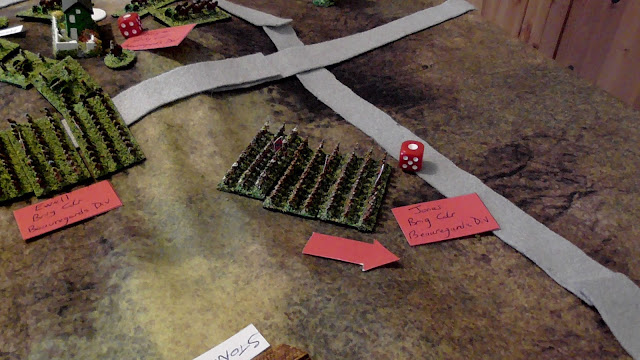
Cocke's Brigade move by New Market towards the Stone Bridge.
Benham's Brigade cross Sudley Ford and head East.
Franklin's Brigade return fire on Bartow's Brigade and score a hit.
Bartow's Brigade now down to only 2 elan.
Howard's Brigade also return fire, they too score a single hit on Bee's Brigade.
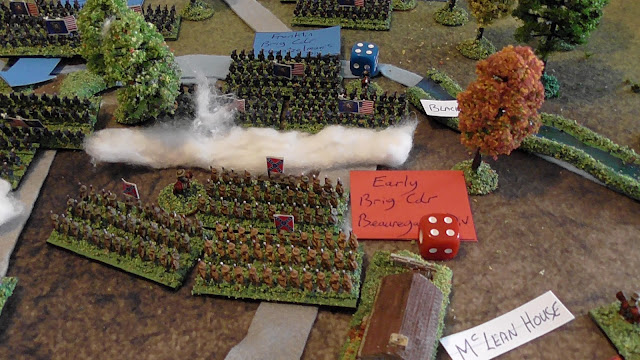
A wall of smoke ahead of Bee's Brigade, the Union assault force is slowly whittling away at the defenders.
A couple of soldier eye views of the exchange.
From a little higher, the task facing the Confederate defenders is clear to see.
At the Stone Bridge Porter scores another hit on Jones' Brigade
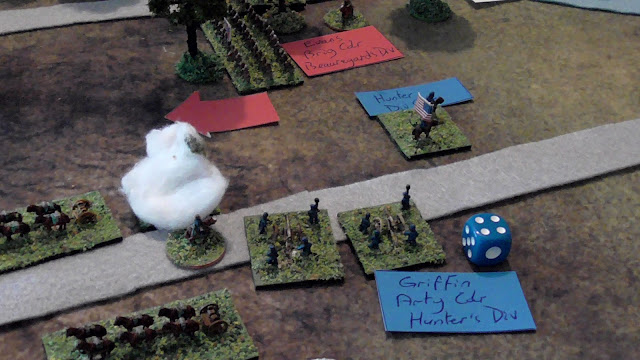
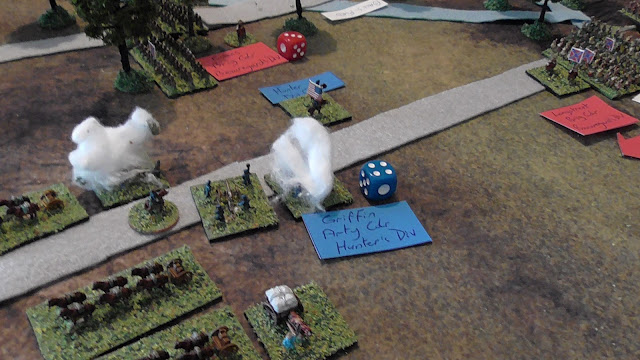
Tidball's Battery take the opportunity to engage in counter-battery fire with Pendleton's Battery, they fail to hit.
Griffin's Battery also engages Rosser's battery, but again no hits are scored.
Rosser's Battery have bigger fish to fry, and score a hit on Porter's Brigade.
Shots taken at the end of Turn Eleven.
Turn Twelve
Jones' Brigade returns fire causing a further loss of elan.
Bee's Brigade also wipe off another elan from Howard's's Brigade.
Evans' Brigade now cross Ball's Ford.
Burnside's shattered brigade continues to withdraw and is taken off the table. This does not count as a lost brigade.
The same with the retiring Blenker's Brigade.
Richardson's Brigade is taken from the main assault force to bolster the defence of Centreville, as the Union attacks in the West start to fall apart, leaving the town vulnerable to the Rebels.
Irvin McDowell now seeing the danger to his right, diverts Richardson's Brigade to slow down the Confederate advance.
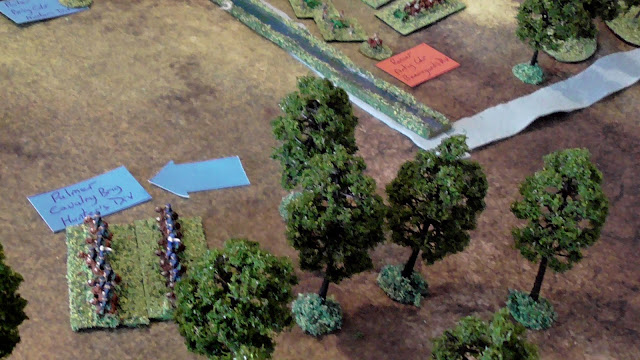
Palmer's Cavalry race to support their now vulnerable artillery from the advancing Rebels.
Porter's beleaguered brigade, now sends in a weakened volley which causes no damage to Jones' Brigade.
Sherman's Brigade gets closer to the summit to deal with Stuart's wannabe infantry. Stuart holds his ground, awaiting to get a shot off with his shorter ranged weapons.
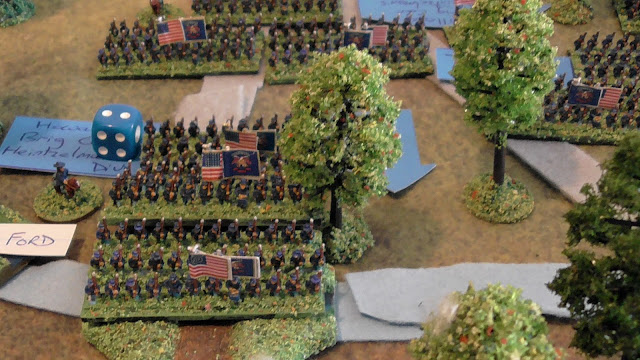
Back at the main assault, Howard's Brigade cause another loss of one elan on Bee's Brigade.
Franklin's volley is devastating, and the two hits cause Bartow's Brigade to rout.
The ford is temporarily unguarded.
Until Smith's Brigade step into the breach, however the Rebels are running out of troops to fill the gaps if the Union assault continues like this.
Bee's Brigade send a volley into Howard's Brigade causing another loss.
Howard's Brigade now down to 2 elan.
Sherman inches nearer to Stuart's dismounted troopers.
Evan's Brigade now clear of the ford, advance on Tidball's exposed artillery brigade.
The Rebel forces at this end of the field are starting to advance in numbers, here Cocke's Brigade approach Ball's Ford.
Benham's Brigade have left Sudley Ford behind and are too advancing.
The final death knell of the Union feint attacks falls on Porter's Brigade as Rosser's Battery reduce his elan to 1 making him now ineffective.
They are in serious danger of routing, which the Union army cannot afford.
Griffin's Battery swing their muzzles to engage Evan's Brigade next turn.
Losses so far, Confederate's 2 infantry brigades.
Union 1 infantry brigade and 1 artillery battery.
The 2 Union infantry brigades who quit the field voluntarily do not count to that total.
Turn 13
Stuart's dismounted troopers slowly pull back from Sherman's Brigade.
Richardson's Brigade continue West to help bolster the defences.
Palmer's Cavalry rush to support the artillery.
Bee's Brigade defending Mitchell's Ford send a destructive volley into Howard's Brigade, forcing the latter to lose its final 2 elan and rout.
A unit the Union could ill afford to lose.
It now brings the Union to three losses out of only four allowed.
Willcox's Brigade now advance to the ford to renew the assault.
Franklin unleashes a volley into Smith's Brigade causing them to lose 2 elan.
The Union assault still looks as strong as ever, but they are running out of time.
Sherman's Brigade start to approach the top of the hill, searching out the elusive troopers of Stuart.
Porter's Brigade, now a spent force, fall back in retreat.
Richardson's Brigade rush forward to support the artillery.
Balloon shots at the end of Turn thirteen.
Turn 14
Porter retreats off the table.
Sherman's Brigade reach the ridge line.
Tidball fires on the approaching Evan's Brigade, but at the sight of the oncoming infantry, miss with the lot.
Griffin's Battery on the flank, do not have the same fear, and score a huge three hits on Evan's Brigade.
Evan's Brigade is rocked by the losses.
Willcox's Brigade charge into Bee's Brigade and push them back, and they are now across the creek!
Schenk moves his brigade in behind the successful Willcox. The Confederate defender are finally starting to be pushed back.
With the success of the charge on his flank, Franklin also charges his men forward, a massive 5-2 victory.
Extract of a letter.
We moved up to the ford when a unit holding it was forced back, I ain't never seen such a sight in my life, thousands of blue coats in front of us and all coming straight for us. We fired our muskets as fast as we could load 'em and the enemy did the same thing. All of a sudden the damn Yankees charged right at us, we wasn't expecting that. Most of us hadn't even fixed our bayonets in the rush to get forward. It was a massacre, the boys were cut down and we were pushed back from the ford. I took a bayonet to my left thigh, but don't you worry, it was more a flesh wound and didn't hit anything vital...
Private Booth, Smith's Brigade, Johnston's Division, Confederate Army of the Shenandoah.
Smith's Brigade is now ineffective and a second Union foothold across the creek is established.
Smiths' Brigade fall back in disarray.
The last uncommitted brigade, that of Early is thrown in to the plug the gap.
With panic spreading in the Confederate ranks, Bee's Brigade fire on Willcox but fail to hit.
Extract from a letter.
We had faced and stopped two Yankee brigades, we never let one of them pass us, or take the ford from us. A lot of the boys are gone, others will heal, many will not. I have nothing more than cuts and bruises, though I do have a hole in my hat, where a musket ball must have passed an inch above my head. I am glad my 90 days is almost up, I sure have had a belly full of this war...
Private Clay, Jones's Brigade, Beauregard's Division, Confederate Army of the Potomac.
The heroic Jones's Brigade are ordered to the rear, the boys gave their all but are now a spent force.
Longstreet leads his brigade over the Stone Bridge.
Ewell is right behind him.
With Benham's Brigade also now out in the open, a major Rebel push is gaining momentum.
Rosser's Battery seizes the moment to fire on Griffin's Battery.
With the loss of a second gun the battery is silenced, with Evan's Brigade at his mercy.
Evan's brigade now advance into musket range of Tidball's Battery.
Turn 15
Extract from a letter.
We waited for the first infantry to appear above the ridge line, and we gave them everything we had, a few of the enemy fell, but there were plenty more behind them. Jeb called for us to pull back, we were not going to make it easy for the blue coats, they would have to hunt us down among the trees on this ridge line. I knew we were not going to survive, but was resigned to my fate. But the Yankees gave up and when I looked, to my surprise they were streaming back down the side of the hill. We didn't know that the battle was over and they, along with the rest of their army, were in retreat!...
Captain Moulden, Stuart's Cavalry, Johnson's Division, Confederate Army of the Shenandoah.
Stuart engages Sherman's Brigade at short range but score no hits.
Rosser's Battery score the decisive shot of the day, when it opens up again on Griffin's Battery and destroys the last gun and therefore the whole battery. It take the Union losses to four and means the game will end at the end of this turn.
Griffin's Battery are destroyed.
This brings the Union losses to four, and they need to destroy three Confederate units this turn to draw.
Evan's Brigade charges into Tidball's Battery but surprisingly are driven back.
Longstreet leads the gathering forces to sweep away any remaining Union defenders in this area of the battlefield and to cut off the main Union army attacking the other fords.
At the main assault, Bee's Brigade score two hits on Willcox and reduce his elan to 3.
Early also scores a hit on Franklin.
McDowell now realises his army is in danger of being cut off from Washington, they may well be able to clear the way to Manassas but a Rebel army will have nothing between here and the capital to stop them'
Before the order to fall back reaches the the troops at the front, Franklin's Brigade pour a volley into Early's Brigade causing two hits.
Willcox's Brigade also cause a further hit on Bee's Brigade.
Extract from a letter.
Sherman's Brigade charge into Stuart's troopers and force them back.
Tidball's Battery pour a devastating canister fire on Evan's Brigade, making it now ineffective with only 1 elan left.
Even so, Longstreet is able to advance towards Centreville unopposed. The battle is over.
Final shots of the battlefield at the end of the battle.
Thank you all for taking the time to read, comment and like the previous posts. I think this shows that Blucher can work in a larger ACW battle. It was a close run thing, if the Union main attack had got onto the battlefield a little earlier, or the feint had been delayed, then things may well have been different.
Subscribe to:
Posts (Atom)


