Welcome back to the First Battle of Bull Run/Manassas, for turns six through nine.
Turn Seven (Union initiative)
Burnside's Brigade along with Porter's Brigade advance to the Stone Bridge.
Porter's brigade move forward to assault the Stone Bridge.
Extract from a letter...
No sooner had we been pulled back out of the wood and away from the enemy artillery, we were ordered to advance and assault the Stone Bridge, Burnside's Brigade would go in first and we would back them up. The boys were determined to get revenge for the buddies we had lost in the woods. Man on man, musket for musket, bayonet for bayonet. That was more to my liking, we can whip these rebels like that, just keep that artillery out of it, that's all I ask...
Private Strombo, Porter's Brigade, Hunter's Division, Union Army of Northeastern Virginia.
The first Union assault goes in on the Stone Bridge. Porter's Brigade on the left, Burnside's on the right.
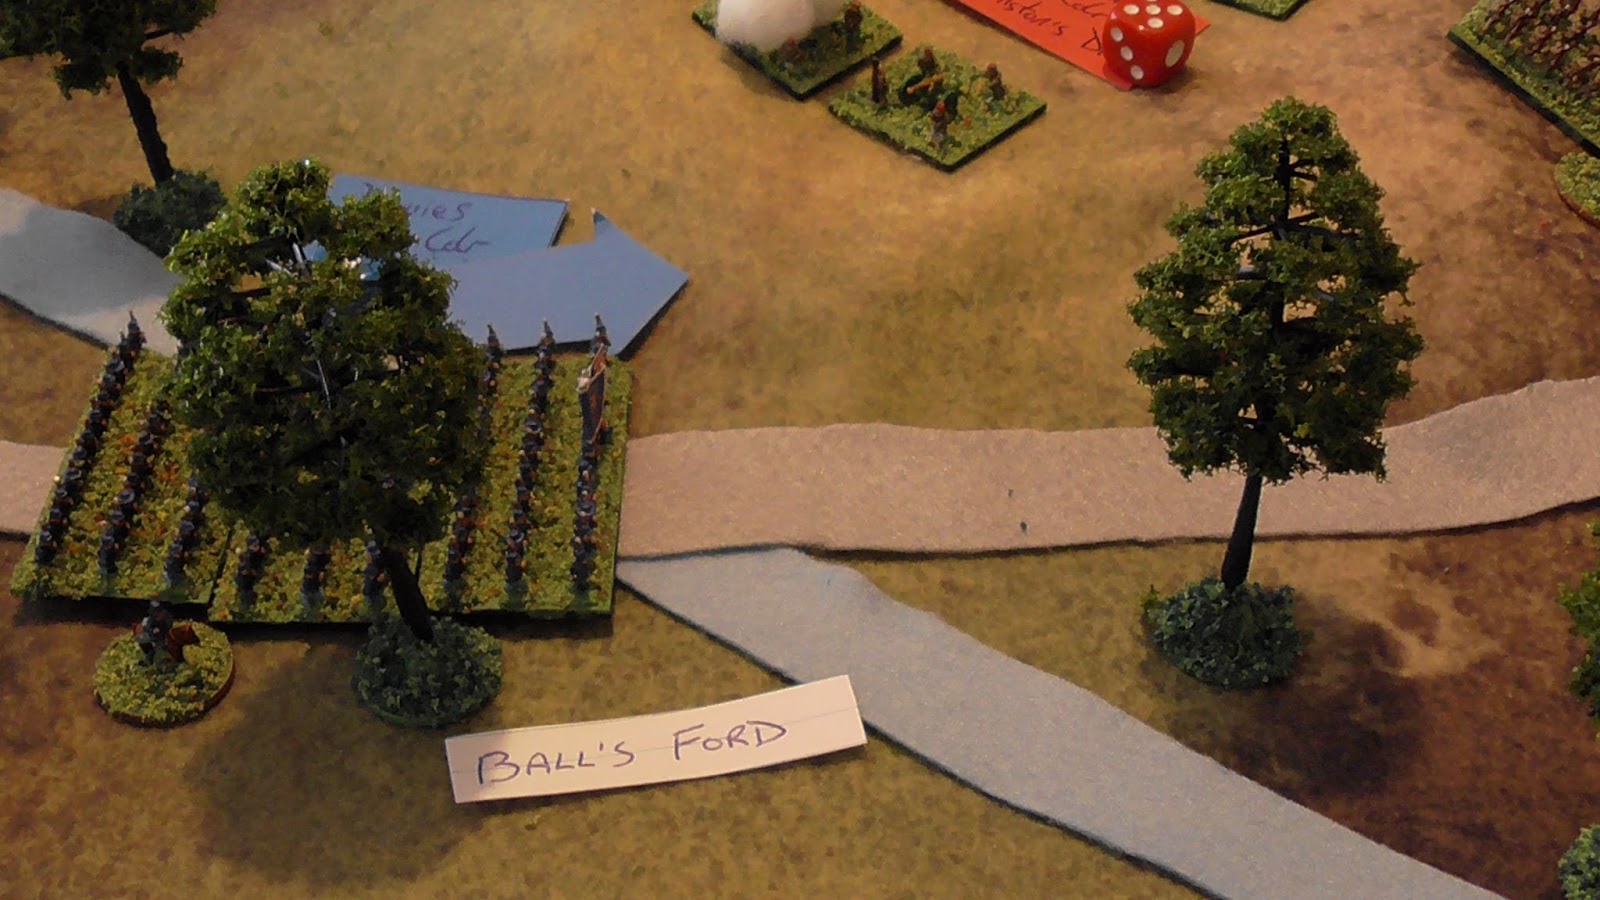
Davies' Brigade move forward to assault Ball's Ford, to cause the rebels, double trouble.
Blenker's Brigade move to the bank of Bull Run Creek to exchange musket fire and tie down the enemy whilst the twin assaults go in.
Rickett's Battery struggle up the steep slope, but once on top, their guns will have a commanding view and can rain down fire on the Confederate defenders of Blackburn's Ford.
The main Union assault force continues to arrive and deploy ready for the attack.
Tyler's Division continue to arrive on the field.
Extract of a letter.
When the General commanding the army comes riding to you, instead of you being summoned to him, you just know there is a problem. Jeb, I and the other officers listened as Brigadier General Johnson explained exactly what that problem was. A Yankee artillery battery was moving to take up a position on the hill commanding our right, that battery had to be stopped. With the Union army advancing toward us we were to ride out, avoid the enemy and take up a position on that hill and prevent its use by the enemy. Sounds easy if you say it quickly. Problem was, once up there we would not be able to return to our lines even if we wanted to...
Captain Moulden, Stuart's Cavalry, Johnston's Division, Confederate Army of the Shenandoah.
Brigadier General Johnston in discussion with Jeb Stuart.
Galloping across Blackburn's Ford Stuarts Cavalry make for the hill.
The enemy artillery battery causing the problem can be seen in the distance.
Cocke's Brigade move up in support of the brigades defending the Stone Bridge and Ball's Ford.
Evan's Brigade also moves forward in support.
Kemper's Battery on Henry Hill open up on Burnside's Brigade.
They score one hit.
The ever busy Pendleton Battery open up on Davies' Brigade.
They record one hit.
Jackson's Brigade unleash a musket volley across the creek into Blenker's Brigade.
The brigade staggers under the impact and loses two elan.
Turn Eight (Confederate initiative)
Stuart's Cavalry make the crest of the hill, beating the Union artillery battery.
Rosser's Artillery that had been covering Sudley Ford ordered to limber up and move to a position overlooking the creek by the Stone House. Jones' Brigade also ordered back to the Stone Bridge.
A second volley of musket fire from Jackson's Brigade on the luckless blue coats of Blenkers's Brigade.
Another hit and a further drop in elan.
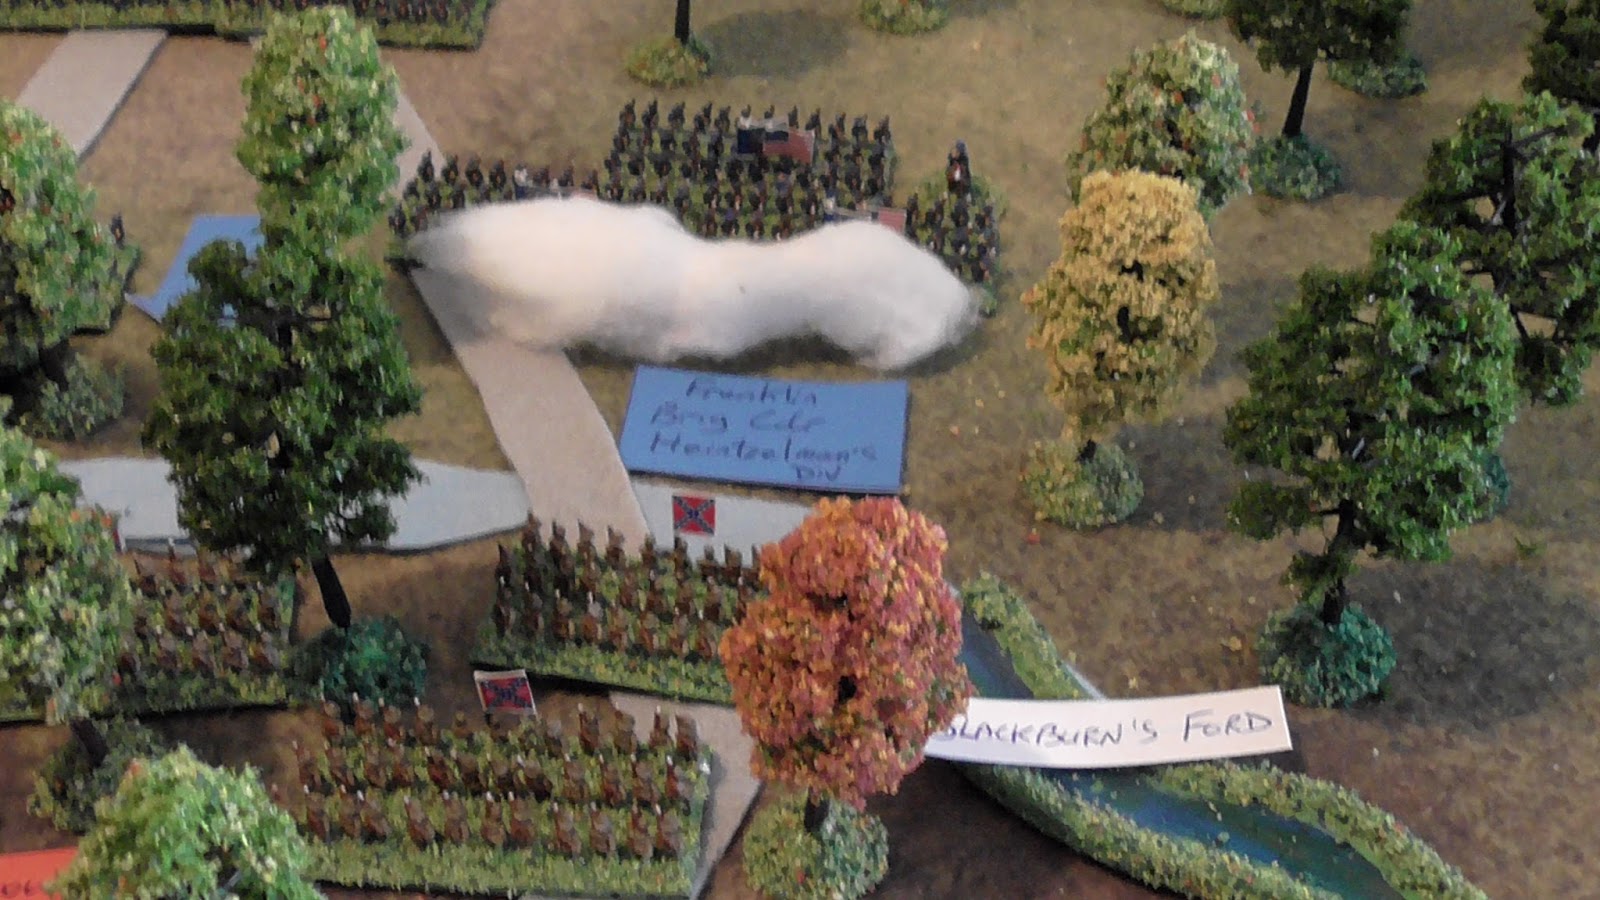
Tyler and Heintzelaman's Divisions continue to deploy for a double assault on Mitchell's and Blackburn's Ford.
Rickett's battery almost at the ridge line of the hill.
Tyler and Heintelman's Divisions forming up and advancing to attack the fords.
Tyler's Division have not all yet arrived on the table, the column stretching back through the town.
Burnside's Brigade go in on the Stone Bridge, leading the infantry attack.
Porter's Brigade move in behind Burnside's Brigade in the attack on the Stone Bridge.
At the same time Davies' Brigade assault Ball's Ford
They begin to cross the creek.
On the bank of the creek, Blenker's Brigade finally get their chance to volley fire at their tormentors, Jackson's Brigade. They miss with the lot!
Stuart's Cavalry dismount and take up positions on the crest of the hill. Their horses safely out of the way.
Rickett's Battery are unaware of the danger ahead, and are just out of range of Stuart's guns.
The final brigade of Brigadier Johnson's army arrive from Manassas Junction, just in time to help in the defence of the two fords.
Extract of a letter.
We were the last of the brigades to board the box cars for Manassas. It sure beats marching. Packed in tight as was possible, we soon organised ourselves to get the most room, the car doors were left wide open to let fresh air in as it was like an oven in the cars. Pretty soon a fiddle and a harmonica were being played and we all joined in the songs. That sure was the best thirty miles marching I ever did...
Private Booth, Smith's Brigade, Johnson's Division, Confederate Army of the Shenandoah.
Holme's Brigade charge Davies' Brigade at Ball's Ford. It is a brutal but evenly matched fight, but Davies' Brigade are forced back. Both suffer fatigue and lose 1 elan.
Jackson's Brigade fire yet another volley at Blenker's Division, causing more casualties and a further loss of elan.
Jones' Brigade unleash a volley at Burnside's Brigade at the Stone Bridge, but cause just a single loss of elan.
Pendleton's Battery unleash a salvo on Davies' Brigade, just recently repulsed at Ball's Ford, causing a further hit.
Extract from a letter,
The Yankee cannon stopped firing and I slowly raised my head. Dead and dying were all about me, some of the wounded cried for help, others for water. We gathered them up as we were ordered to pull back away from the Stone Bridge, out of cannon range. It was a relief, I can tell you. We reformed our ranks someway back and watched as the blue coats advanced towards the bridge. The colonel gave the order and we moved back to our old position, I tried not to look at the blood stains and other sights to awful to describe in this letter. As the blue coats came into musket range, we took aim, the order came to fire, a deafening noise and clouds of powder smoke filled my ears and eyes. As it cleared I was shocked to see piles of dead Yankees, where just seconds before, they had been proudly advancing in neat rows...
Private Clay, Jones' Brigade, Beauregard's Division, Confederate Army of the Potomac.
Jones' Brigade unleash a devastating volley of musketry into Burnside's Brigade.
It causes three hits and Burnside's Brigade is now incapable of attacking, and is in great danger of routing!
A soldier's eye view of the horrific volley into Burnside's boys.
Another Union brigade becomes shaken and incapable of further action as Jackson's Brigade fire another volley into Blenker's Brigade causing a further hit.
Rosser's Battery arrive on the banks of the creek and begin to unlimber.
Davies' Brigade now bravely charge into the rebels of Holmes' Brigade.
In another brutal melee, Davies' Brigade are forced back, both units lose a fatigue point.
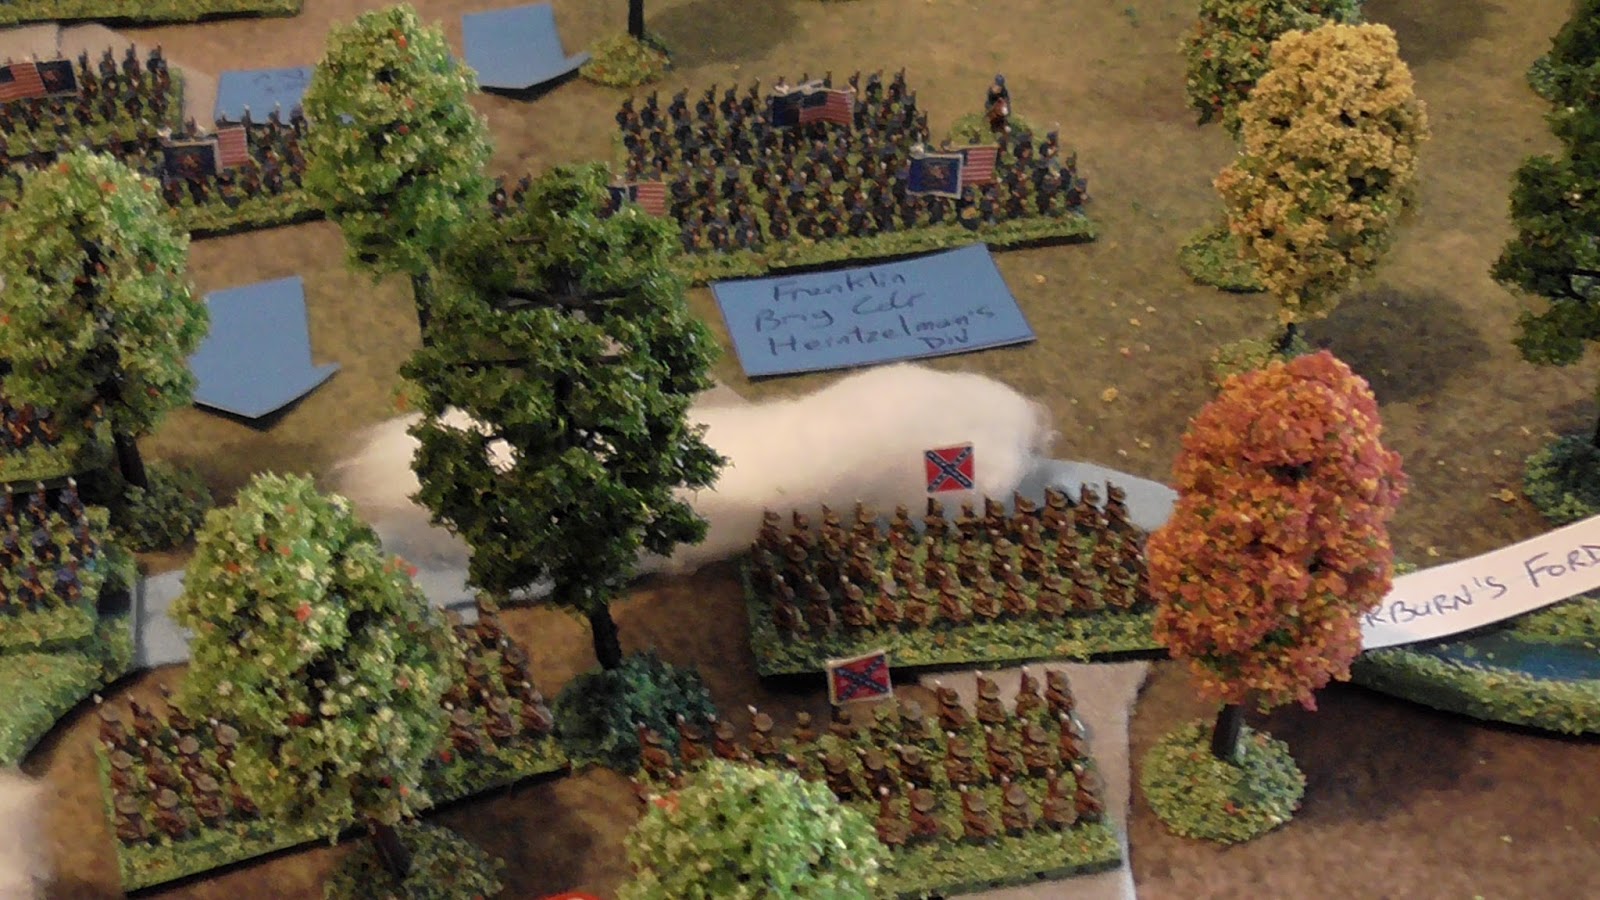
With things going badly in the East at Ball's Ford and the Stone Bridge, those attacks had always been planned as a feint, to tie down Rebel troops to that area. The main assault was going to go in on Blackburn's and Mitchell's Fords. Here that assault is getting underway.
The attack force of two full divisions is beginning its assault.
Extract from a letter.
The field was a sea of blue coats as far as they eye could see. Ahead of my brigade was Franklin's Brigade and to my right Willcox's Brigade, behind me was Sherman's Brigade, What a wondrous sight we must have looked. Surely, nothing can stop this mighty army sweeping away the Rebels before us, two full divisions in the assault force...
Lieutenant Brown, Keyes' Brigade, Tyler's Division, Union Army of Northeastern Virginia.
The bluecoats just keep coming and coming!
As the final artillery battery makes its way on to the field, Brigadier General Irvin McDowell is confident of success.
The final Union infantry and the end of the column, Richardson's Brigade approaches Centreville.
Colonel Rickett's is alarmed to see troops on the ridge ahead of him!
Some photographs at the end of Turn Nine.
Another long post, but hopefully enjoyable. I hope one or two of the fuzzy photographs didn't spoil it for you. I have already played out and photographed Turn 10, and a lot happened! but that along with the rest of the battle is for another post.